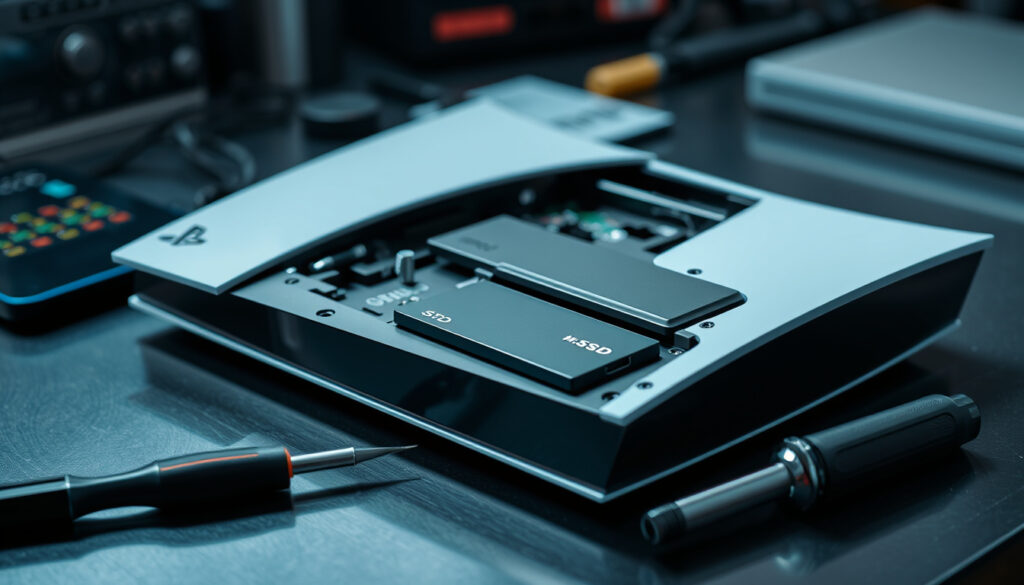
How to Upgrade PS5 SSD: Step-by-Step for All Models
Running out of space on your PS5 is a uniquely frustrating experience—you’re mid-download, the notification pops up, and suddenly you’re choosing which game to delete. Sony built an officially supported M.2 SSD expansion slot right into the console specifically to solve this, and the process is more straightforward than most people assume.
PS5 Internal Storage: 825GB base · Max SSD Capacity: Up to 4TB supported · SSD Type Required: M.2 NVMe PCIe 4.0 · Heatsink Needed: Recommended · Lifespan Estimate: 5-10 years typical
Quick snapshot
- PS5 SSD upgrade officially supported since launch (PlayStation Official Support)
- Games stored on M.2 SSD are fully playable, unlike USB extended storage (PlayStation Official Support)
- Whether future PS6 release will affect PS5 storage ecosystem (PS5 SSD Installation Tutorial)
- Warranty implications of third-party heatsink installation (Android Central Guide)
- M.2 SSD feature launched via beta system software in 2021 (PS5 Beta SSD Tutorial)
- PS5 Slim (CFI-2015) model released 2023 with M.2 expansion slot (PS5 Slim SSD Walkthrough)
- 4TB SSDs like WD Black SN850P work reliably in PS5 (WD Black SN850P Test Video)
- PS5 firmware recognizes storage up to 8TB, though Sony officially supports up to 4TB (PS5 SSD Installation Tutorial)
These specifications represent the compatibility requirements verified across official PlayStation documentation and community testing.
| Label | Value |
|---|---|
| Compatible SSD Type | M.2 2280 PCIe 4.0 |
| Read Speed Minimum | 5500MB/s |
| Max Capacity | 8TB |
| Warranty Impact | No void if official compatible |
| Tools Required | Phillips screwdriver |
Can the PS5 SSD be upgraded?
Sony designed the PS5 from the outset to accept additional storage through an officially supported M.2 SSD expansion slot. This isn’t a hack or workaround—it’s a feature Sony has actively documented and improved since the console launched. Games stored on an M.2 SSD are fully playable, which sets it apart from the USB extended storage option that only supports game installs for older titles.
TL;DR: The PS5 accepts PCIe Gen4 x4 M.2 NVMe SSDs up to 4TB officially (8TB recognized). Games are fully playable from the expansion drive—Sony built this slot intentionally, and it’s the only storage upgrade path that lets you run the latest titles from added space.
Requirements for compatible SSDs
- Interface: PCIe Gen4 x4 M.2 NVMe (SATA SSDs are not supported) (iFixit Teardown Guide)
- Form factor: 2280 (length × width in mm)
- Minimum read speed: 5,500 MB/s (PlayStation Official Support)
- Thermal management: Heatsink or cooling structure required (PlayStation Official Support)
- Capacity range officially supported: up to 4TB; firmware recognizes up to 8TB (PS5 SSD Installation Tutorial)
Benefits of upgrading storage
Adding an M.2 SSD solves the base 825GB limitation that leaves most owners with roughly 667GB usable after system files. Modern AAA titles regularly consume 100GB or more, meaning the stock drive can fill up surprisingly fast. An upgrade means no more deleting games to make room for new ones—a genuine quality-of-life improvement for anyone who buys titles regularly.
Heatsinks typically cost between $10-$15, which adds to the total investment. However, skipping thermal management risks throttling performance or, in worst cases, overheating issues according to Android Central’s testing.
How to add an M.2 SSD to a PS5 console?
The installation process involves opening the console, securing the SSD with proper thermal contact, and letting the PS5 handle formatting automatically. Sony’s official instructions walk through each step, though community guides offer model-specific nuances worth knowing.
Preparation steps
- Fully power down the PS5 by holding the power button until you hear two beeps—rest mode won’t work (PS5 SSD Installation Tutorial)
- Unplug all cables from the console (PS5 SSD Installation Tutorial)
- Remove the base stand if your PS5 is docked (original PS5 model requires a screw removal step)
- Gather a Phillips screwdriver and your M.2 SSD with heatsink attached
- If using separate thermal pads, position them on the SSD before insertion (PS5 Thermal Setup Video)
Installation process
- Open the expansion bay cover (original PS5: side panel; Slim: bottom panel) (PS5 Slim SSD Walkthrough)
- Adjust the metal spacer to the 80 mark for standard 2280-length SSDs (Android Central Guide)
- Tilt the SSD diagonally upward and insert firmly into the expansion connector (PlayStation Official Support)
- Secure with the retaining screw, ensuring the spacer catches the mounting notch
- Close the expansion bay cover and reconnect all cables
Post-install formatting
Boot the PS5 and follow the on-screen prompt—the console automatically formats the new SSD. According to Sony’s documentation, this process fully erases any pre-existing data on the drive, so there’s no need to partition or prepare it beforehand. Once complete, the storage appears under Settings → Storage → M.2 Storage (PS5 Thermal Setup Video).
PS5 automatically handles formatting, so you can’t accidentally use the wrong file system. This design choice removes a potential error point that other console or PC storage upgrades sometimes suffer from.
How to install SSD in PS5 Slim?
The PS5 Slim (model CFI-2015) shares the same M.2 SSD specifications as the original but differs in how you access the expansion bay. The physical layout changed with the slim redesign, meaning the panel removal process is noticeably different—though no more difficult once you know the trick.
Differences from original PS5
- Expansion bay location: Bottom panel instead of side panel (PS5 Slim SSD Walkthrough)
- Panel removal: Pry the top left corner upward with your fingers—no tools required
- Stand removal: Simpler twist-lock mechanism instead of screw
- Internal layout: Condensed but same M.2 slot specifications
Step-by-step for Slim model
- Power down completely and lay the Slim flat (not standing)
- Remove the stand by twisting the locking ring
- Locate the bottom panel seam and gently pry upward from the top-left corner (PS5 Slim SSD Walkthrough)
- Slide your fingers along the seam to release all clips, then lift the panel away
- Proceed with SSD installation using the same spacer adjustment (80 mark) and insertion angle (diagonal upward) as other models
- Reattach the panel by aligning clips and pressing until they click
The PS5 Pro (model CFI-7000) follows similar procedures with the same slot specifications. The Samsung 990 Pro and WD_BLACK SN850P are both reportedly compatible with Pro models for storage expansion (Samsung 990 Pro Installation Guide).
Slim owners actually have an easier time accessing the slot compared to original PS5 owners—the panel removal is tool-free and the process takes less time overall once you get the hang of the clip-release motion.
Can I put a 4TB SSD in my PS5?
Yes—and for most users, it’s the sweet spot between capacity and cost. While Sony officially supports up to 4TB for optimal performance, the PS5 firmware reportedly recognizes drives up to 8TB, meaning larger capacities work technically, though they’re less tested in the community.
Capacity limits
- Official Sony support ceiling: 4TB (PS5 SSD Installation Tutorial)
- Firmware-recognized maximum: 8TB (though less community-verified)
- Minimum capacity: 250GB (lower capacities technically possible but not practical)
- Recommended sweet spot: 2TB for budget-conscious; 4TB for extensive libraries
Recommended 4TB models
Several M.2 SSDs with built-in heatsinks are marketed specifically for PS5 compatibility. The WD_BLACK SN850P is Western Digital’s PS5-optimized variant, while the Samsung 990 Pro with heatsink is also widely reported as compatible with both standard PS5 and PS5 Pro models.
Pre-built heatsink models eliminate the separate heatsink purchase but often cost more upfront. The ORICO 1TB SSD features a custom-sized heatsink designed to align precisely with the PS5 expansion slot, though community testing of this model is less extensive than established brands.
Is 2TB enough for PS5?
For a majority of PS5 owners, 2TB represents a practical middle ground—but whether it’s “enough” depends heavily on your buying habits and game library size. Understanding actual storage consumption helps set realistic expectations before you commit to a capacity.
Storage needs by game size
Modern AAA titles typically demand 100GB or more per install. Horizon Forbidden West weighs in around 100GB, Call of Duty games regularly exceed 150GB, and some releases push past 200GB with day-one patches and HD texture packs. This means a 2TB drive (roughly 1.8TB usable) might hold 15-20 contemporary games at realistic install sizes.
Pros and cons of 2TB
Upsides
- Costs significantly less than 4TB options
- Enough for 15-20 AAA titles depending on size
- Single-sided heatsink options widely available
- Most tested capacity in community reports
Downsides
- Fills faster than many users expect
- May require deleting games for large new releases
- Less future-proof than 4TB for collectors
- Heatsink options less pre-integrated than 4TB models
The implication: if you buy more than 2-3 new games per month or maintain a large back-catalog habit, the 2TB ceiling will likely frustrate you within a year. For casual buyers who cycle through their library and delete finished titles, it remains a cost-effective choice that solves the original storage problem adequately.
The table below consolidates the technical requirements for anyone comparing storage upgrade options across different drive models.
| Specification | Requirement | Notes |
|---|---|---|
| Interface | PCIe Gen4 x4 M.2 NVMe | SATA not supported |
| Form Factor | 2280 (22mm × 80mm) | Length × Width |
| Minimum Read Speed | 5,500 MB/s | Sequential read |
| Recommended Read Speed | 7,000+ MB/s | Better headroom |
| Capacity Range | 250GB – 8TB | Official support: 4TB max |
| Thermal Solution | Single-sided heatsink recommended | Double-sided works but fits harder |
| Metal Spacer Position | Mark 80 for 2280 SSDs | Adjustable for different lengths |
| Insertion Angle | Diagonal upward | Then press flat to secure |
Do not install additional heatsinks on M.2 SSDs that already have built-in heatsinks—this may reduce thermal effectiveness, according to Sony’s official documentation. Single-sided cooling structures are easier to fit than double-sided formats and are recommended for most users.
Related reading: cloud storage options · hardware setup guide
youtube.com, youtube.com, youtube.com, youtube.com, youtube.com
For compatible M.2 NVMe PCIe 4.0 drives up to 4TB with proper heatsinks, this step-by-step PS5 SSD guide mirrors official Sony expansion tips across all models.
Frequently asked questions
What SSD specs does PS5 require?
PS5 requires an M.2 NVMe SSD with PCIe Gen4 x4 interface, 2280 form factor, and minimum sequential read speed of 5,500 MB/s. A thermal solution (heatsink) is required for reliable operation, and Sony recommends single-sided designs for easier installation.
Do I need a heatsink for PS5 SSD?
Yes, Sony officially requires effective heat dissipation through a cooling structure such as a heatsink and heat transfer sheet. Without proper thermal management, SSDs risk overheating and throttling performance. Heatsinks cost $10-$15 separately, or you can buy SSDs with pre-integrated heatsinks.
Does upgrading SSD void PS5 warranty?
Using officially compatible SSDs in the designated expansion slot does not void the warranty according to Sony’s documentation. However, damage caused by improper installation or incompatible components may not be covered. Always follow Sony’s official guidelines and use properly tested drives.
How much does PS5 SSD upgrade cost?
Costs vary by capacity: 1TB PCIe 4.0 NVMe SSDs start around $80-100, 2TB models range $120-180, and 4TB drives typically cost $250-350. Add $10-15 if you need a separate heatsink. Pre-assembled SSDs with built-in heatsinks often cost slightly more but simplify the installation.
Can I upgrade PS5 SSD myself?
Absolutely—the process requires only a Phillips screwdriver and takes 15-20 minutes for first-timers. Sony designed the slot for user accessibility, and the console handles all formatting automatically. The main challenges are sourcing a compatible SSD and handling the small components carefully during insertion.
What happens if SSD is incompatible?
If the PS5 doesn’t recognize the SSD, it won’t appear in storage settings and you’ll receive an error message during formatting. Common causes include SATA interface (not supported), insufficient read speed, or physical length incompatible with the spacer adjustment. Check specifications before purchasing.
How to remove PS5 SSD after install?
Removing the SSD requires powering down, unplugging, and accessing the expansion bay again. Unscrew the retaining screw and tilt the SSD upward to release it from the connector. Note that formatting is required each time you reinstall a drive—the PS5 doesn’t retain the file system between removals.
Expert perspectives
To install an M.2 SSD in PS5, open the case and unscrew the expansion port. Tilt the SSD diagonally upward and firmly insert into the expansion connector. PS5 will format the M.2 SSD automatically when booted.
— PlayStation Official Support
M.2 SATA SSDs are not supported on PS5 consoles. Formatting an M.2 SSD during PS5 setup will fully erase all data on the drive—there’s no recovering from this.
For PS5 owners juggling a growing library of storage-hungry games, the upgrade path is clear: grab a PCIe Gen4 NVMe drive with a heatsink, spend 20 minutes with a screwdriver, and reclaim your gaming freedom. The console handles the technical side automatically once you’re done. Sony’s official support documentation covers the essentials, while community testing has validated options ranging from budget 1TB drives to the 4TB models that turn the PS5 into a genuine content library powerhouse.
More related posts
 Tyler Seguin Injury Update: Return, Career Timeline, and More
 Moms Holiday Stocking Stuffers – Best 2024 Gift Ideas
 Miami Heat v San Antonio Spur Match Player Stat : 2013 & 2025
 Sadia Khan: Is She a Real Psychologist or Dating Coach
 Katherine LaNasa: Cancer, Emmy Win & Late-Career Rise
 Sam Darnold Biography, Salary, Stats, and Career 2025
 JonBenet Ramsey Case: Key Evidence, Theories, and Latest Updates
 Conversion livre en kg: Pounds to Kilograms Made Simple
